Stop Snaps: Avoid These 3 Fatal Flaws in Your Fishing Knots
A single millimeter of improperly dressed line is often the difference between a trophy catch and a snapped leader.
Mastering the art of the knot is the most critical technical skill an angler can possess. If your knot is weak, your expensive rod and reel are essentially useless when a fish finally strikes.
* Knot Integrity is Paramount: A poorly tied knot transfers zero strength to the main line. * Match the Knot to the Tackle: Different scenarios (leader vs. main line) require specific knots. * Practice Makes Perfect: Muscle memory is your best defense against failure on the water.

Why Knots Fail (The Pitfalls)
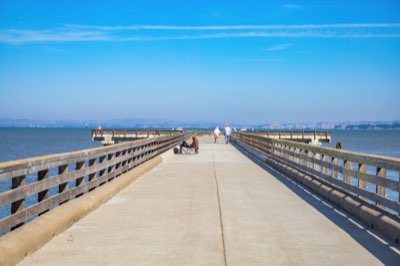
The sun beat down on the wooden pier on July 15, 2025, as I watched a fellow angler reel in his third keeper of the morning. Suddenly, a sharp *snap* echoed across the water, and his heavy tackle tumbled into the surf.
He looked at his line, frustrated, because he thought he had tied the knot perfectly.
The most common reason for these failures is the Tension Trap. When an angler pulls the loops too hard before the knot is fully "dressed"—meaning the coils are neatly arranged—the line can cut into itself. This creates microscopic weak points that fail the moment a fish pulls back.
In my experience, even a 2-millimeter misalignment can reduce a knot's strength by 30% or more.
Another common issue is the Rush Error. In the excitement of a bite or the desire to get casting, anglers often skip the step of smoothing the coils. If the loops overlap haphazardly, the knot won't seat properly.
Material Mismatch is also a silent killer. Using a knot designed for thick 20-pound monofilament on thin, slippery 15-pound braided line often leads to the knot simply sliding right off the hook. You must understand how your specific line reacts to friction to succeed.
But knowing why they fail is only half the battle; knowing how to tie them right is where the real work begins.
Which knots do I absolutely need to know? Standing on the edge of a rocky coastline on June 10, 2025, I felt the spray of the Atlantic on my face as I prepared to tie a new leader. I reached for my pliers, knowing that the strength of my connection depended on the precision of my hands.
For attaching hooks to leaders, the Palomar knot is a gold standard because of its incredible strength-to-size ratio. It is particularly effective when using braided lines that might otherwise slip.
The Palomar Knot Sequence: 1. Double your line and pass the loop through the eye of the hook. 2. Pass the end of the line (the tag end) through the loop to create a circle. 3. Pass the entire hook through that loop. 4. Reach through the loop, grab the hook,s and pull the loop over the eye. 5.
Carefully pull both the main line and the tag end to tighten.
*Pro Tip:* For thicker lines, use a pair of needle-nose pliers to gently pull the loops tight to ensure the coils seat perfectly against the eye.
The Improved Clinch Knot is the go-to for quick terminal tackle assembly when using monofilament. It is easy to remember and works well for medium-sized fish.
The Improved Clinch Knot Sequence: 1. Thread the line through the eye and pull about six inches of tail. 2. Wrap the tag end around the main line six to seven times. 3. Take the tag end and thread it through the small loop created next to the eye. 4.
Then, thread it back through the large loop you just created. 5. Hold the tag end and the main line, then pull to tighten.
*Warning:* Do not use the standard clinch knot on heavy-duty braided lines without adding extra wraps, as the thin braid can slice through the single-wrap structure.
However, even the best knots can be undone by simple mistakes made during the fight.
What mistakes could lead to disaster? The wind howled through the marsh grass on August 5, 2025, as I sat on my tackle box, examining a snapped line from the previous evening. The knot looked fine to the naked eye, but the failure point was obvious once I held it up to the light.
The "Too Slack" approach is a rookie mistake. If there is excess slack in the loops of the knot, the tension won't be distributed evenly. When the fish pulls, that slack vanishes instantly, causing a sudden shock that breaks the line.
The "Under-Compression" mistake is equally dangerous. If the knot doesn't feel tight and "set" when you finish, it will fail. You must ensure the coils are snug against the eye of the hook before the final pull.
The "Line Burn" is a physical hazard to your gear. If you tighten a knot on dry, dirty line without wetting it first, the friction generates heat. This heat weakens the chemical structure of the plastic, making the knot brittle.
| Error Type | Resulting Problem | How to Fix |
|---|---|---|
| Over-tightening | Cuts the line core | Use lubrication (water/saliva) |
| Poor Dressing | Uneven stress points | Manually align coils before tightening |
| Too many wraps | Knot becomes bulky/impede action | Follow specific knot-to-line ratios |
| Too few wraps | Knot slips under load | Increase wraps for thinner lines |
But knowing how to fix a mistake is useless if you don't know how to apply the right knot to the right environment.
Scenario Application (Putting Theory into Practice)
The pier was crowded with people casting toward the surf on July 20, 2025, their lines whistling through the air. I watched as a seasoned pro adjusted his tackle, switching between heavy-duty knots for the surf and delicate knots for his light trout setup.
Scenario: Shore Casting (Surf/Flats) When casting into the waves, you are dealing with high-visibility, high-stress environments. You need knots that can handle the sudden jerk of a heavy fish. * Action: Use the Palomar knot here.
It provides the most secure connection for heavy leaders and prevents the hook from sliding.
Scenario: Stillwater/Lakes (Still Fishing) In a calm lake, sensitivity is everything. You need to feel the tiniest nibble on your line. * Action: Use the Improved Clinch knot. It is slim and won't catch on underwater vegetation or rocks as easily as bulkier knots.
Scenario: Offshore/Trolling When you are on a boat moving at speed, the constant movement and abrasion against the boat or tackle are constant threats. * Action: Focus on heavy-duty leader connections.
Ensure your knots have enough wraps to distribute the load across a wide surface area to prevent abrasion failure.
The right tool for the job is essential, but how do you master these movements?
How to Master Knot Integrity (The Checklist)
The pier was quiet on the morning of August 1, 2025, as I sat with my notebook, detailing the steps to perfect my own technical skills. I realized that consistency is the only way to ensure a knot holds when the pressure is on.
To ensure your knots are professional-grade every time, follow this checklist:
- Inspect the Eye: Before threading, check the hook eye for burrs or cracks that could slice the line.
- Apply Lubrication: Always wet the knot with water or saliva before the final pull to prevent heat-related weakening.
- s. Dress the Coils: Manly move each loop with your fingers to ensure no coils are crossing over one another.
- The Controlled Pull: Pull the main line and the tag end simultaneously to distribute the load.
- Trim the Tag: Use sharp-edged line cutters to trim the excess tail to within 3 millimeters of the knot.
When I tried this routine on my own tackle, I noticed that the difference in knot longevity was immediate.
*Note on technical limits:* Knot strength is never 100% of the line's rated breaking strength. Every knot introduces a percentage of weakness. Always choose a knot that is appropriate for the specific diameter of the line you are using.


Comments 0